
Welcome to our Dreamtime Design Craft Challenge for December! We sure hope you enjoy this one. Our theme is "Christmas ~ Use a New Technique".
When I first started to really think about something new I would like to do, I was at a loss. So, I hopped on the internet and started checking out all kinds of crafts and techniques. At first I thought maybe I would do a gingerbread house, as I had never done one. But in the process of looking at designs and instructions to make one, I came across this technique! It is designing with frosting! Yes, Frosting! Royal frosting made with meringue powder and powdered sugar. The results were amazing! When I saw this picture of a church made with it I was sold:


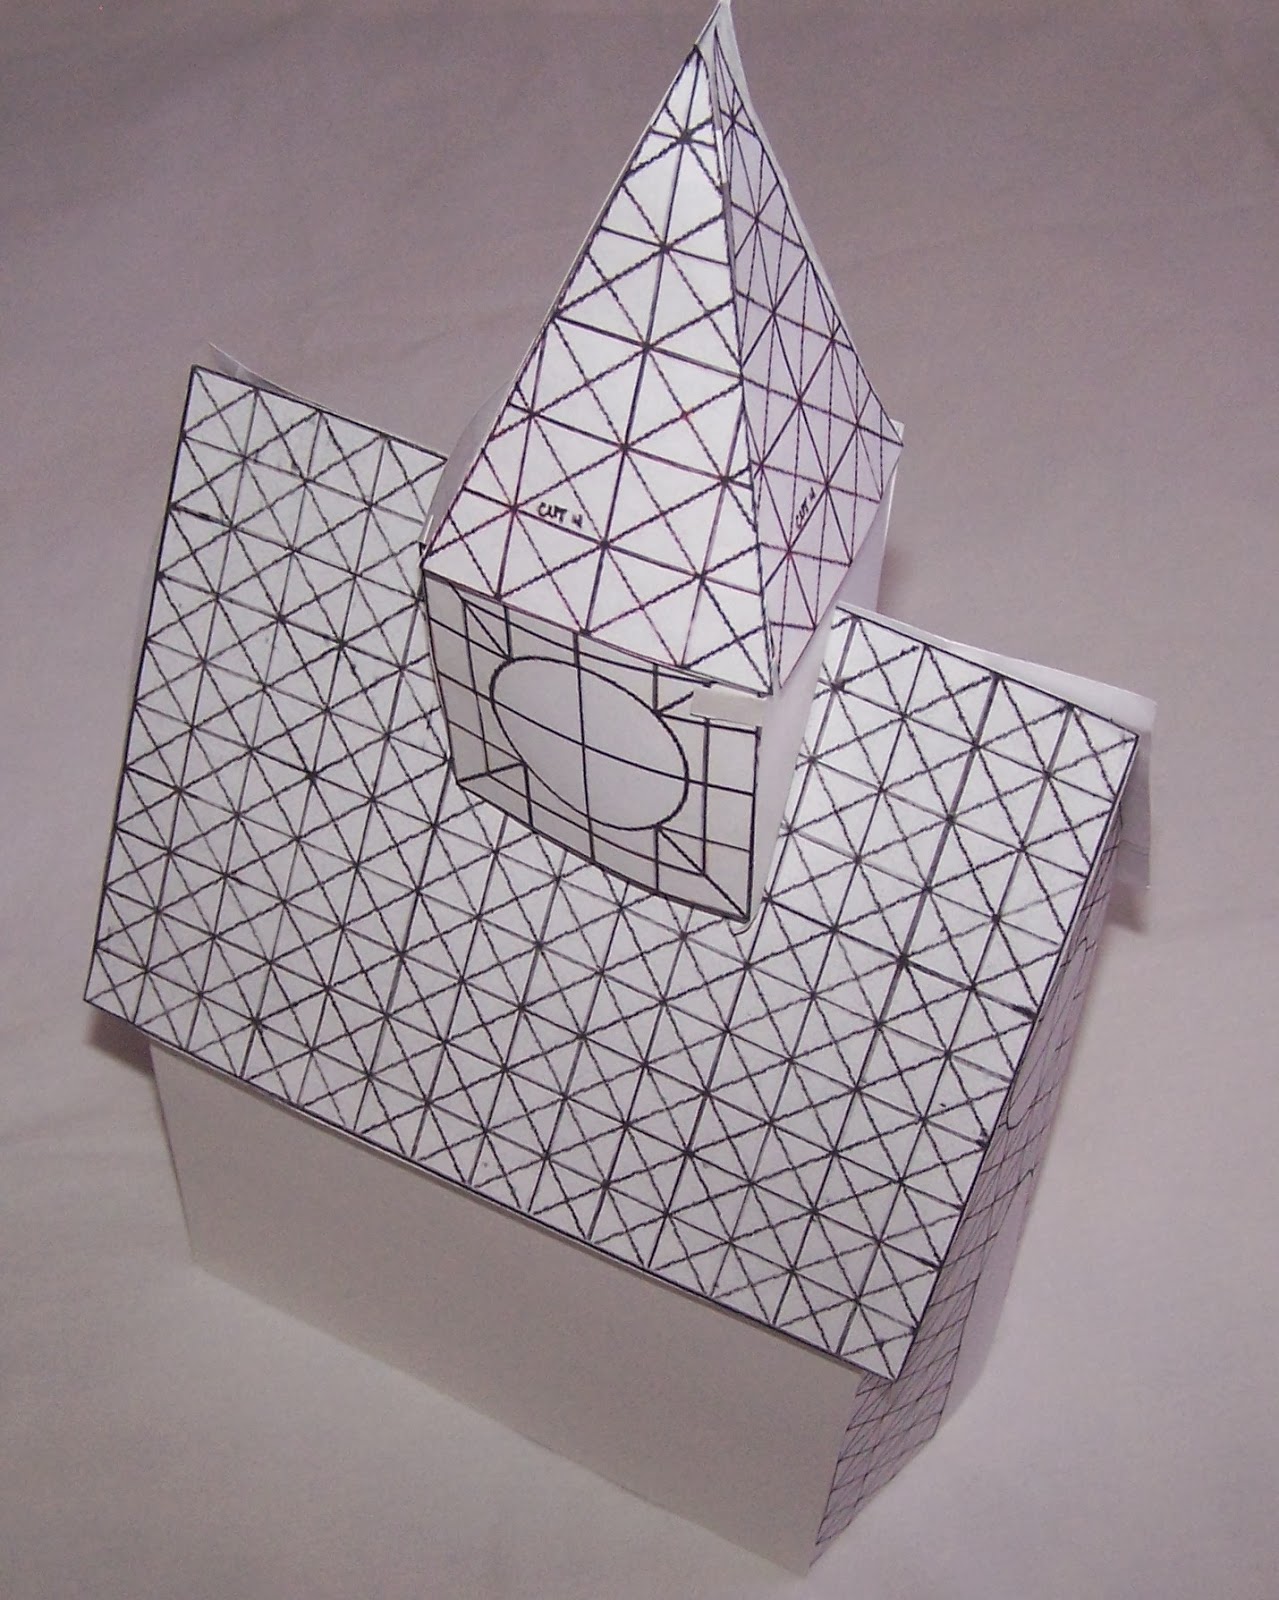
The first thing I did was print out the pattern for all of the pieces I planed to make; roof, steeple, cross, 2 sides, front & back, and trees.

Then I cut all the pieces out of paper and assembled them to make a model and be sure all the pieces fit and were of the right size ~ they were!

I got all the supplies I needed to make the church:
The recipe for the frosting
Disposable Plastic Decorating Bags
#3 Frosting Tip & Screw Tops To Hold The Tip To Bag
Cardboard Pieces
Wax Paper & Tape
Printed Pattern Pieces
LOTS OF PATIENCE!!!
First tape you pattern pieces to the cardboard for stability and cover with wax paper. Be sure it is secured snugly. Make your frosting and put it in the assembled decorating bag. Start squeezing the bag to get a nice flow and cover every line of your pattern pieces.

I designed the stain glass windows from examples give in pictures:

After you have done your pieces make sure you let them dry for at least 24 hrs. I then used a large, thin spatula to gently insert under the pieces to lift them off of the wax paper. Work VERY slowly, don't rush it! It is very, very delicate! There will be breakage, but they can be done again. It is time consuming but not difficult!
Now it is time to assemble the pieces. Patience is your best friend, lol. You "glue" all of the pieces together with more frosting and let dry. I added tissue paper to the inside of my stained glass windows for some color.

I then made a base to sit the church on from foam board and covered it with aluminum foil. I cut a hole in the middle to put a candle in so the church would glow from within! I sprayed it all with fake snow. Next I needed to put on the roof and the steeple. Time to sit the church upright and begin.

Oh so VERY gently I put it on the base. I started to glue on the roof pieces. One went on very well, the other would not quit slipping down. I decided to tilt it to more of a flat angel so it wouldn't slip so much. Then the WORST that could happen DID!

WAAAAAAHHHHHHHH!
Oh well, doodoo happens, lol! I have to tell you I was a bit upset, only because I was so looking forward to the final result. But you know, these are the things that can happen when you try a new technique! Practice, practice and MORE practice, lol! I learned a LOT on what to do and NOT to do. The most important thing is DO NOT RUSH what you are doing, and you have to have the lightest angels touch when handling your pieces! GO SLOW and GENTLY! I will do it again, but will do it on a smaller scale. Large pieces are VERY hard to work with as they are sooooooo delicate!
Here are a couple of the trees that were going to be placed around the church, they survived, LOL! I would love to do a few little houses and the church and make it like a village..... Some day!

To sum it all up, I will say I VERY much enjoyed the project even though it ended in catastrophe! When doing a new technique it is a LEARNING experience, and I learned a lot! So, goal completed!
HAPPY CRAFTING!!!
You did such a beautiful job with the royal icing. The trees that survived the collapse are absolutely breathtaking! I can't wait to see your next attempt.
ReplyDeleteYou score major points in my opinion for even trying something so intense...my hat is off to you, lovely Joanne!!
hugs--
Roberta
Queen Bee Paper Crafts
You've done such a wonderful job, dearest Joanne. Though everything didn't work out the way you want, you already got the point, learning new technique, and that's really fantastic. Looove the trees Joanne. You're such a wonderful talented ladies :D
ReplyDeleteWarm hugs, Mikha
Oh wow Jo, what a lot of work and it was gorgeous, so sorry it didn't last but at least seeing pics of the various stages gave us an idea of what the finished piece would have been like. The little trees are brilliant :o)
ReplyDeleteJackie xx
Hi Joanne, I love this technique. What a lot of work you have put a lot of work to it. The technique is very clear and I love the trees you have made! Big hugs, Cindy
ReplyDeleteCongratulations Joanne for being brave and showing us your wonderful project even if it didn't go to plan! It still looks amazing! And I am glad your little trees survived they are beautiful! When you make it again be sure to show us. Hugs Julie xox
ReplyDeleteoh Joanne it was such a shame your project didnt work out as it would have been AMAZING! I love the little trees and so glad they made it! thanks for sharing this technique :) Gem xx
ReplyDeleteAaw honey!!! So sorry that you didnt get to finish your stunning project!!! I am sure that it would have been amazing, your very talented to have gotten that far!!!! I am sure that you will get it done sometime soon, the trees are fantastic on their own. Take care.
ReplyDeleteCuddles Jay xxx
I am so gutted for you that you didn't get to see it finished, but wow where you had got to looked amazing. It looks so intricate and beautiful and the tissue paper for a bit of colour looked fantastic. This all must of taken so much time. This project is Soooo different, you are a great inspiration to try new things and to encourage people to push their boundaries xx
ReplyDeleteOh my goodness Joanne, I feel soooo badly for you. That was such a gorgeous masterpiece and for it not to co-operate for you is just such a let done. Wow.....thank-you for sharing this idea. I am totally going to try it out.
ReplyDelete